Gluten Free Chocolate Brownies

37323267_10213012060040523_3674292544033783808_n.jpg

These brownies are definitely a favourite with my friends and family!! Also a bonus that my sister can enjoy them as well šŸ™‚ Not one of my most nutritious recipes but I’m all about balance and these brownies are so delicious, perfect with a cuppa tea!

Ingredients (makes roughly 15)

375g butter

300g milk/dark cooking chocolate

120g cocoa powder

100g gluten free self raising flour (I use doves)

500g caster sugar

6 eggs

Method

  1. Preheat your oven to 180°C and get your baking tin ready, I used a 30cm x 20cm tin and lined it with baking parchment.
  2. In a heatproof bowl over some simmering water or in the microwave, melt the butter and chocolate and mix until smooth.
  3. In a separate bowl, sift the cocoa powder and flour. Add the sugar and mix together.
  4. In another bowl, whisk the eggs.
  5. Add the melted butter/chocolate mix and the eggs to the flour mix. Mix altogether until you have a smooth, silky consistency.
  6. Pour the mix into your baking tray and place in the oven. Check after 30 minutes, at this point the brownies are starting to brown well on top but still have a wobbly centre. Put back in for another 15 – 30 minutes (a total of approx 45 – 60 minutes bake time).
  7. You want the brownies to be slightly gooey and moist in the middle so if you skewer them, it’s not going to come out clean. As long as there is a slight spring on the outside once you take them out of the oven, this will be fine.
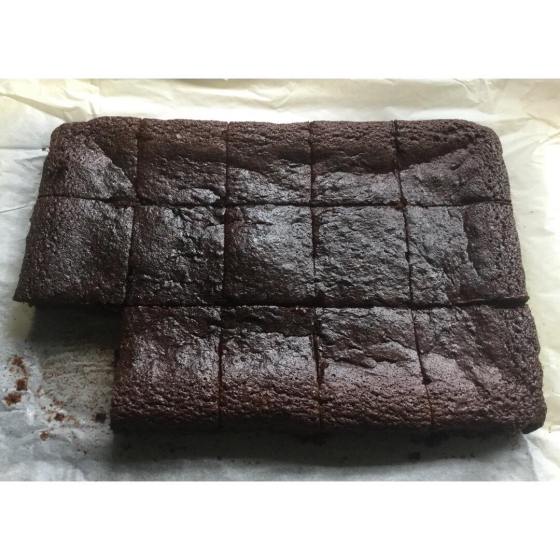
  8. Allow to cool on a tray and cut into delicious brownie squares šŸ˜€

37290168_10213012058800492_603780949078966272_n.jpg

Enjoy,

Tee. X

Oat Waffles

Bought myself a waffle iron in Lidl a few weeks ago. The moment I set my eyes on it, there was no way I was leaving it behind! Finally got around to trying out some waffles on it this morning. I opted for Oat Waffles and used certified gluten free oats so that my sister can have some as well if she wants (recently diagnosed as coeliac). So these waffles can be gluten free or not just depending on your oats and just to make sure your baking powder is gluten free as well. If you don’t have a waffle iron.. Get one!! But no if not, you can use this mixture for pancakes as well, just to leave out the baking powder because there’s no real need for baking powder in pancakes. Anyway recipe and all that below šŸ˜€

waffles2.jpeg

Ingredients

1 & 1/2 cup regular oats/certified gluten free oats

2 tsp baking powder (check the label if it’s gluten free or not)

1/2 tsp himalayan salt

1/2 tsp cinnamon

1 cup milk (I used almond but whatever you like)

2 eggs

2 tbsp maple syrup

1 tsp vanilla extract

Method

  1. In a blender, place all the ingredients and blend for 15 – 20 seconds. Stop and mix around with a knife as some of the oats may get caught at the bottom. Blend again until mixture is totally smooth.
  2. Turn on your waffle iron to preheat and set it to a medium – high heat, mine had a number dial from 1 – 5 so I set it between 3/4 and I brushed some rapeseed oil on the iron to grease it.
  3. Once the waffle iron is ready to go, pour the mixture onto the iron, enough so that it reaches the sides, you can give it a helping hand to spread out with a spatula if you like. Just make sure you haven’t put too much mixture so that it doesn’t spill over the sides. Close the lid of the iron and cook for about 3 – 5 minutes, depending on how brown you’d like them. Make sure not to open the lid until after 2 minutes because if you open it before this, it may tear your waffle.
  4. Once the waffle is cooked, remove carefully and keep warm under the grill or in an oven while you cook the rest. If you want to keep the crispness of the waffle, don’t pile the waffles on top of each other while they’re keeping warm.
  5. Serve whatever you like on top of the waffles, I went for 1 banana, greek style coconut yoghurt and a drizzle of maple syrup.

waffles.jpeg

Enjoy šŸ™‚

Tee. X