Cacao & Coconut Energy Balls

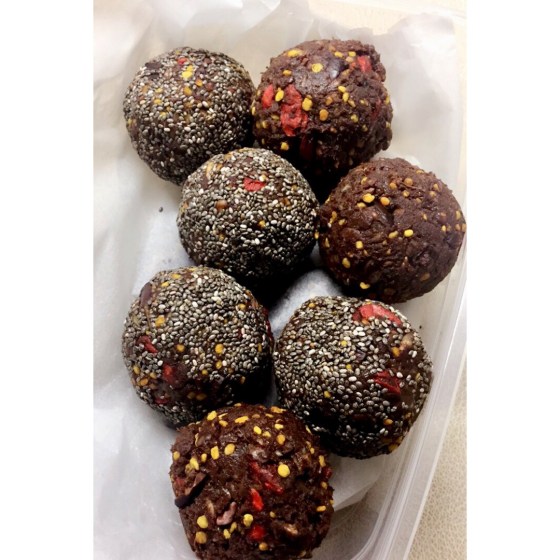
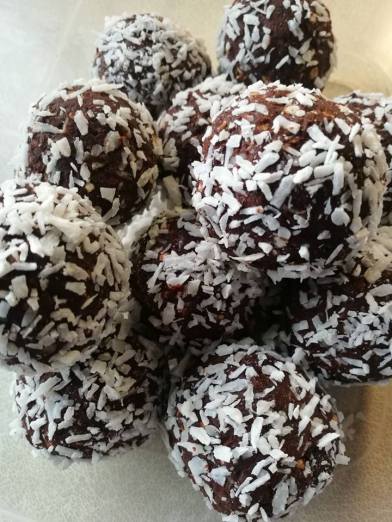
Literally just whipped these up this evening. I was craving something sweet so made do with whatever ingredients I had in my cupboard to make these balls. Energy/Protein balls are so versatile, you can be so inventive with them and change around ingredients as well. I made these within a half an hour and got around 11 golf sized balls outta the below mixture.

Ingredients

200g pitted dates soaked in water (keep water aside after draining the dates)

70g cashew butter (can use alternative nut butter)
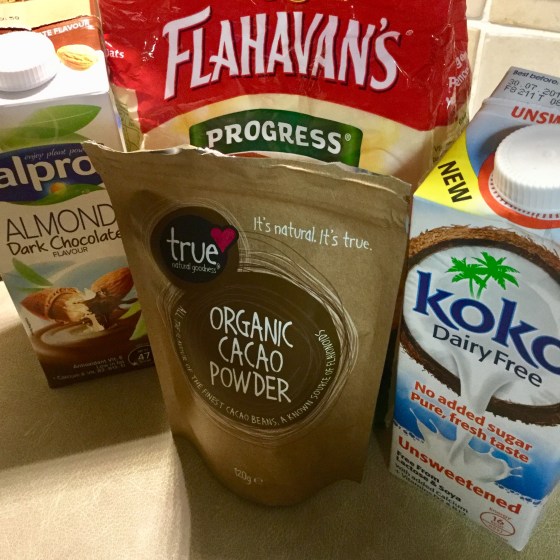
50g cacao powder

50g gluten free oats (you can use regular oats, I just used these so ma sista can eat them too)

2 tbsp milled flaxseed

good handful of desiccated coconut for coating the balls

Method

  1. Soak the dates in warm water.
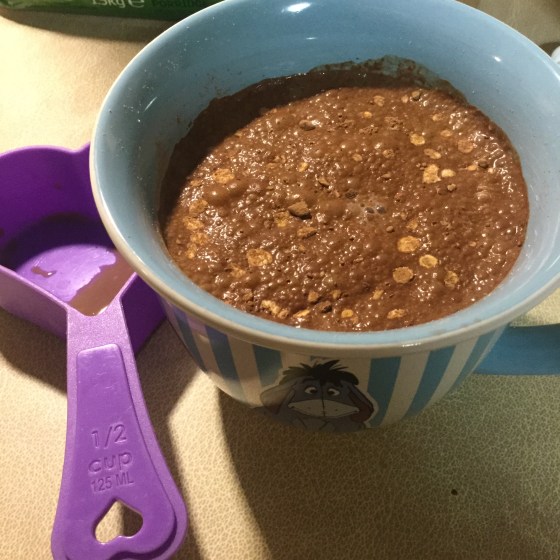
  2. Meanwhile, place the rest of the ingredients in a blender/food processor – cashew butter, cacao powder, oats and flaxseed.
  3. Drain the dates but keep the water aside. Add the dates to the processor and blend.
  4. If you find the mixture is too dry, add some of the water in – not too much because the mixture could get too wet. You don’t want it to be too sticky.
  5. Once you’re happy with the mixture. Roll into golf sized balls and roll the balls in the desiccated coconut to coat.

coconut balls

Enjoy πŸ™‚

Tee. X

Cacao Overnight Oats

Pretty obsessed with these overnight oats! They’re probably my most common breakfast especially during the winter months. Oats are such a nutritious breakfast and if you’re any bit of a nutrition nerd like me, here’s all you need to know about why them oats are so good for ya! ~Β https://www.healthline.com/nutrition/9-benefits-oats-oatmeal#section3

DC664336-49E7-41F5-8A7A-673AD6E87A95

Ingredients

half cup porridge oats

heaped tsp cacao powder

half cup dark chocolate almond milk

half cup coconut milk

Method

  1. Stir the oats and cacao powder together in a bowl.
  2. Add in the milk and stir.
  3. Cover with cling film and leave in the fridge overnight.
  4. In the morning, heat your oats in the microwave for about 2-3 minutes or in a saucepan on a low/medium heat for roughly the same amount of time.

359B5F8C-8F5A-4E0A-95D2-05462716FFBC

Enjoy πŸ€—

Tee. X

Gluten Free Chocolate Brownies

37323267_10213012060040523_3674292544033783808_n.jpg

These brownies are definitely a favourite with my friends and family!! Also a bonus that my sister can enjoy them as well πŸ™‚ Not one of my most nutritious recipes but I’m all about balance and these brownies are so delicious, perfect with a cuppa tea!

Ingredients (makes roughly 15)

375g butter

300g milk/dark cooking chocolate

120g cocoa powder

100g gluten free self raising flour (I use doves)

500g caster sugar

6 eggs

Method

  1. Preheat your oven to 180Β°C and get your baking tin ready, I used a 30cm x 20cm tin and lined it with baking parchment.
  2. In a heatproof bowl over some simmering water or in the microwave, melt the butter and chocolate and mix until smooth.
  3. In a separate bowl, sift the cocoa powder and flour. Add the sugar and mix together.
  4. In another bowl, whisk the eggs.
  5. Add the melted butter/chocolate mix and the eggs to the flour mix. Mix altogether until you have a smooth, silky consistency.
  6. Pour the mix into your baking tray and place in the oven. Check after 30 minutes, at this point the brownies are starting to brown well on top but still have a wobbly centre. Put back in for another 15 – 30 minutes (a total of approx 45 – 60 minutes bake time).
  7. You want the brownies to be slightly gooey and moist in the middle so if you skewer them, it’s not going to come out clean. As long as there is a slight spring on the outside once you take them out of the oven, this will be fine.
  8. Allow to cool on a tray and cut into delicious brownie squares πŸ˜€

37290168_10213012058800492_603780949078966272_n.jpg

Enjoy,

Tee. X

Oat Waffles

Bought myself a waffle iron in Lidl a few weeks ago. The moment I set my eyes on it, there was no way I was leaving it behind! Finally got around to trying out some waffles on it this morning. I opted for Oat Waffles and used certified gluten free oats so that my sister can have some as well if she wants (recently diagnosed as coeliac). So these waffles can be gluten free or not just depending on your oats and just to make sure your baking powder is gluten free as well. If you don’t have a waffle iron.. Get one!! But no if not, you can use this mixture for pancakes as well, just to leave out the baking powder because there’s no real need for baking powder in pancakes. Anyway recipe and all that below πŸ˜€

waffles2.jpeg

Ingredients

1 & 1/2 cup regular oats/certified gluten free oats

2 tsp baking powder (check the label if it’s gluten free or not)

1/2 tsp himalayan salt

1/2 tsp cinnamon

1 cup milk (I used almond but whatever you like)

2 eggs

2 tbsp maple syrup

1 tsp vanilla extract

Method

  1. In a blender, place all the ingredients and blend for 15 – 20 seconds. Stop and mix around with a knife as some of the oats may get caught at the bottom. Blend again until mixture is totally smooth.
  2. Turn on your waffle iron to preheat and set it to a medium – high heat, mine had a number dial from 1 – 5 so I set it between 3/4 and I brushed some rapeseed oil on the iron to grease it.
  3. Once the waffle iron is ready to go, pour the mixture onto the iron, enough so that it reaches the sides, you can give it a helping hand to spread out with a spatula if you like. Just make sure you haven’t put too much mixture so that it doesn’t spill over the sides. Close the lid of the iron and cook for about 3 – 5 minutes, depending on how brown you’d like them. Make sure not to open the lid until after 2 minutes because if you open it before this, it may tear your waffle.
  4. Once the waffle is cooked, remove carefully and keep warm under the grill or in an oven while you cook the rest. If you want to keep the crispness of the waffle, don’t pile the waffles on top of each other while they’re keeping warm.
  5. Serve whatever you like on top of the waffles, I went for 1 banana, greek style coconut yoghurt and a drizzle of maple syrup.

waffles.jpeg

Enjoy πŸ™‚

Tee. X

Seedy Cacao Balls

Long time no new recipe!! I definitely haven’t given myself the time to try anything new recently but decided to mess around with a few ingredients during the week and came up with these energy balls. To be honest you can be as creative as you like with energy/protein balls, that’s the great thing about them and why you’ll probably find so many different recipes for them out there. But they’re a great snack to have ready especially when you’re on the go. I made these at the start of the weekend and they lasted me for the week ahead, I had one every day for my mid-morning snack πŸ™‚

These are the ingredients and method I used but feel free to use it as a guideline and leave out or include different ingredients if you fancy πŸ˜€

Ingredients

200g pitted/medjool dates (medjool dates are probably best to use as they’re softer but are more expensive so go half pitted/half medjool if you wish..just make sure to take out the pit if you’re using medjool!)

100g warm water

60g cacao powder

200g mixed seeds (sunflower/pumpkin)

40g bee pollen

40g cacao nibs

40g goji berries

1 tsp of himalayan salt

desiccated coconut/chia seed to coat the balls

image1

Method

  1. Soak your dates in the warm water for 5-10 minutes.
  2. In a food processor, put the dates, water and cacao powder and blitz until combined.
  3. Add the seeds and pulse again until roughly combined.
  4. Add the bee pollen, cacao nibs, goji berries and salt and blitz again.
  5. The mixture should have come together now.
  6. Using your hands, weigh out the balls at 50g each and roll into a ball.
  7. Once they are all weighed out. Roll the balls in desiccated coconut or chia seeds if you like, you can also leave them plain and not cover them in anything.
  8. To store them, keep them in an airtight container in the fridge as this will keep them for longer. They should keep like this for up to a week or 2 weeks max.


image2


Enjoy,

Tee πŸ™‚ X

Italia

Just back from a week away in Italy touring Lake Garda, Verona and Venice and safe to say the food and drink was amazing. So amazing that a food baby was gained but all worth it!!

One of the main reasons we went to Italy was for the food and wine so here were the foodie highlights..

Villa CalicantusΒ 

Set in Bardolino.

18426182_10209732553934920_570929437_o18379550_10209732553534910_1569071012_o18379478_10209732553494909_297570248_o18379476_10209732552294879_372845839_o

Daniele was our host for the evening. He explained the menu to us, told us his background and about the vineyard. You could tell he was really passionate about what he does.

18379396_10209732551534860_581536732_o

We started with a bottle of red…

And homemade bread with Daniele’s “magic mushrooms” and olive oil. This was my favourite and I wouldn’t be a mad mushroom fan but these were honestly the best mushrooms I’ve ever had!

18426404_10209732551654863_857253151_o

Next, tried some salami…

18426139_10209732549054798_1409582577_o

And last but not least the selection of cheeses!!

18379556_10209732547774766_410533778_o

To finish the tasting off we had a bottle of RosΓ©…

And Daniele gave us some homemade biscuits to go with it which I didn’t manage to get a photo of which is a good sign I guess!

So that was our Italian vineyard experience and was definitely one of the highlights of our holiday.


Trattoria Al Graspo

This was the restaurant Daniele recommended to us.

Our waiter brought us to a table and explained that it was a set menu and you had a choice between meat, fish or a veggie option. We went with meat and fish. There were so many courses between us it was hard to keep up! We were spoilt! This was my favourite restaurant by far. I even tried snail AND frog which I had no idea I was eating until our waiter informed me after, we all got a good laugh off of that!

18405983_10209732545694714_412183753_o

18426541_10209732545214702_2022827046_o

18405431_10209732543694664_1539572314_o

18379581_10209732542534635_356529296_o

18379482_10209732543174651_1921520437_o

18405463_10209732542134625_2140595444_o

My favourite dessert to finish it all off then.. Chocolate biscuit cake!

Would highly recommend this spot and would go back again!

___________________________________________________________________________________________

Villa Calicantus and Trattoria Al Graspo were the foodie highlights of Lake Garda for me.

We also came across a food market in Verona which was pretty impressive.

18427047_10209732541414607_587385993_o

And so much pizza was consumed throughout the week that it’s safe to say I won’t be eating another pizza again for a while!

18405671_10209732546654738_1941355548_o

And far too much wine…

18406188_10209732546414732_543262717_o

Our goal was to eat and drink in Italy and that we did!

Ciao,

Tee. X

Matcha Latte

I’ve always loved green tea so it’s no wonder I’ve fallen in love with matcha! AndΒ it’s only recently thatΒ I’ve been introduced to the Matcha Latte & Bulletproof Matcha Latte and it’s safe to sayΒ they’re becoming one of my favourite hot drinks as I wouldn’t be much of a coffee drinker anyway πŸ˜€

Being a bit of a nutritional geek I had to find out for myself what exactly is matcha and here it goes… Matcha is a form of Japanese green tea which is ground into powder form which means that much moreΒ of its nutritional content is retained giving it a higher content of antioxidants and phytonutrients thanΒ standard green tea. MatchaΒ helps to regulate neuro-hormones, boost adrenal function and offers aΒ steady boost of energy andΒ focus. My favourite benefit though has to be that matcha contains an amino acid called L-theanine – aka meditative brain wave food! L-theanine stimulates the production of alpha waves in the brain those found in deep mediation, and isΒ associated with relaxation and mental alertness, as well as influencing dopamine and serotonin our feel good neurohormones… which explains why I’m always left feelingΒ so zen after my matcha πŸ™‚

(References ~ http://nyssaskitchen.com/bulletproof-matcha-latte/ & http://www.carolinehansennutrition.com/recipes/bulletproof-matcha-tea)

Anyway enough of me going on about how great it is! Here’s the recipe for my matcha latte that I made this morning…

Ingredients

1 tsp matcha

1 tbsp boiling water

300ml coconut milk

1 tsp coconut oil

1 tsp organic honey

cinnamon

Method

  1. Gently heat your coconut milk in a saucepan. While that is heating, in a mug mix together your matcha and boiling water until you have a paste.
  2. When your milk is hot enough, pour into a jug along with your matcha paste and coconut oil and whizz these ingredients together with a hand blender until it appears kind of frothy.
  3. Pour back into your mug, stir in your honey and sprinkle some cinnamon on top.

Enjoy the matcha goodness πŸ™‚

Tee.X


Creme Egg Brownies

I’m such a chocoholic so Easter is definitely one of my favourite times of the year because of that! Creme eggs aren’t out and about for that long so I just had to make these brownies! These brownies are to die for, rich in chocolate and so moist, it’s hard not to eat the whole batch! I sneaked in a few nutritious ingredients to try balance the recipe out as best I could but they’re still pretty lethal with those creme eggs in there πŸ˜€ 80/20 πŸ˜‰

12915314_10206457976112521_1055208886_o

Ingredients

185g dark chocolate

185g coconut oil/butter (I used a combo of half coconut oil/half butter)

85g plain spelt flour

40g cacao powder

3 eggs

275g coconut sugar

6 cadbury creme eggs

Method

  1. Preheat the oven to 180Β°C.
  2. Melt the coconut oil/butter and chocolate together in a bowl over a pan of simmering water. Once melted, leave to cool slightly.
  3. Whisk your eggs and sugar together using an electric mixer until well combined.
  4. Add the chocolate mixture into your eggs and sugar.
  5. Sift in the flour and cacao powder and fold everything together gently.
  6. Pour everything into your brownie tray and cook for about 20 minutes.
  7. While that’s cooking, cut your creme eggs in half. This can be tricky without making a mess πŸ˜›
  8. After 20 minutes, take out your brownies. Place your eggs on top of the half cooked brownies and gently press down. I fitted 3 across each row.
  9. Bake for a further 10 minutes or until cooked through.
  10. Once cooked, leave to cool for a while before cutting.

Enjoy πŸ™‚ Try not to each the whole batch at once πŸ˜‰

12921920_10206457975392503_2009456463_o

Happy Easter β™₯

Tee.X

Donal Skehan’s Raspberry Almond Muffins & Red Velvet Beetroot Chocolate Muffins

Made both these recipes at the weekend for a fundraiser coffee morning. The original recipes are both from Donal Skehan’s cookbook ‘Fresh’ but I changed them around a bit using a few different ingredients πŸ™‚

12695649_10206080599278336_1022310571_o (1)

Raspberry and Almond Muffins

Ingredients

150g coconut oil, melted

125g coconut sugar

2 large eggs

1 tsp vanilla extract

150g buckwheat flour

1 tsp baking powder

1/2 tsp bicarbonate of soda

50g ground almonds

100ml almond milk

250g raspberries

Method

  1. Preheat the oven to 180Β°C and line a 12-hole muffin tin with paper cases.
  2. Beat the coconut oil and sugar together in a large bowl until combined. Add the eggs and continue whisking again until well combined. Stir through the vanilla extract.
  3. Sift in the flour, baking powder and bicarbonate of soda and then fold through. Fold in the ground almonds and almond milk. Finally, gently fold in the raspberries until evenly dispersed.
  4. Divide the mixture between the muffin cases, filling each one about two-thirds full. Bake for 20 minutes-25 minutes, or until golden brown and a thin metal skewer inserted in the centre comes out clean.
  5. Leave to cool slightly on a wire rack.


Red Velvet Beetroot Chocolate Muffins

Ingredients

100g dark chocolate, melted

200g cooked beetroot

110g coconut sugar

110g coconut oil, melted

2 large eggs

175g buckwheat flour

1 tsp baking powder

50ml almond milk

(For the chocolate frosting, if you want to be very good you can leave this out πŸ˜› )

100g butter, room temperature

100g icing sugar

1 tsp vanilla extract

2 tbsp boiling water

50g cacao powder

Method

  1. Preheat theΒ oven to 180Β°C and line a 12-hole muffin tin with paper cases.
  2. PurΓ©e the cooked beetroot until smooth using a hand-held stick blender and then add in the melted chocolate.
  3. Beat the coconut oil and sugar together in a bowl, using a hand-held electric mixer. Whisk in the eggs until well combined. Mix in the flour, baking powder and milk and finally fold in the chocolate and beetroot mixture.
  4. Divide the muffin mixture between the paper cases, filling each about two-thirds full, and bake for 20-25 minutes until a thin metal skewer inserted into the centre comes out clean. Allow the muffins to cool.
  5. For the frosting; beat all the ingredients together until you have a thick paste. Once the muffins have cooled, spread the frosting on top of the muffins using a small palette knife.

Enjoy πŸ™‚

Tee.X

Raw Chocolate & Caramel Squares

I have the biggest sweet tooth and chocolate is definitely one of my weaknesses! So as you can imagine Christmas was a bit indulgent with all the sweets and chocolates around!

Even though I’m so sad Christmas is all over with now, I love the feeling of getting back into my normal eating routine which is filled with lots of nutritious foods! My sweet tooth is never going to go away though so I always try to make sure I have some healthy treat lying around so that I don’t go for the bad stuff!

I love these raw chocolate and caramel squares because they are the perfect treat after all the Christmassy indulgences and are guilt free too! Definitely worth a try and they’re so easy to make too – no cooking required πŸ™‚

IMG_1169

Ingredients

First Layer:

20 medjool dates, pitted

5 tbsp coconut flour

1/4 cup water (more if needed)

Second Layer:

20 medjool dates, pitted and soaked

1 tbsp cacao butter, melted

Third Layer:

100g dark chocolate, melted (the darker the better)

Method

  1. Start with the first layer. Blend dates in a food processor until you have a big and sticky ball. Break the ball up slightly before adding in the coconut flour and mix again until you have Β a powder consistency. Add water gradually until it starts to look like a crumble. Remove and place in a square glass container (mine was 20cm x 15cm). Spread with the back of a spoon until you have a nice flat layer. Freeze.
  2. Next is the second layer. Using the same food processor (no need to clean it out), blend the soaked dates and melted cacao butter. Slowly add in the water used to soak the dates until you have a smooth and creamy consistency, be careful when adding the water, you don’t want it to be too liquid, should be thick and creamy. Spread over the first layer and freeze again while you prepare your melted chocolate.
  3. Once your chocolate is melted, spread over the caramel layer and freeze again for 5 minutes until the chocolate has hardened.
  4. Top with some of the leftover first layer if you have some. Slice into squares…

IMG_1168

…and enjoy πŸ™‚

IMG_1167

Yummy! πŸ˜€

Tee.X